Introduction
JSON Web Tokens (JWT) are a compact, URL-safe means of representing claims to be transferred between two parties. They are commonly used in API authentication and authorization.Configuring your API to use JWT authentication
The OpenAPI Specification treats JWT authentication as a variant of bearer authentication in thecomponents.securitySchemes object using the type: http, scheme: bearer and bearerFormat: jwt:
Authorization header, but Tyk is configurable, via the Tyk Vendor Extension, to support custom header keys and credential passing via query parameter or cooke.
authentication.stripAuthorizationData field (Tyk Classic: strip_auth_data).
With the JWT method selected, you’ll need to configure Tyk to handle the specific configuration of JSON Web Tokens that clients will be providing. All of the JWT specific configuration is performed within the authentication.jwt object in the Tyk Vendor Extension.
Multiple User Credential Locations
The OpenAPI Specification’ssecuritySchemes mechanism allows only one location for the user credentials, but in some scenarios an API might need to support multiple potential locations to support different clients.
The Tyk Vendor Extension supports this by allowing configuration of alternative locations in the JWT entry in server.authentication.securitySchemes. Building on the previous example, we can add optional query and cookie locations as follows:
Using Tyk Classic APIs
As noted in the Tyk Classic API documentation, you can select JSON Web Token authentication using theuse_jwt option.
Protecting an API with JWT
To protect an API with JWT, we need to execute the following steps:- Set Authentication Mode
- Set the JWT Signing Method
- Set the Identity Source and Policy Field Name
- Set a Default Policy
- Generate a JWT
Set Authentication Mode
- Select JSON Web Tokens as the Authentication mode
-
Set the cryptographic signing method to
HMAC (shared)and the public secret astyk123 -
Set the Identity Source and Policy Field Name
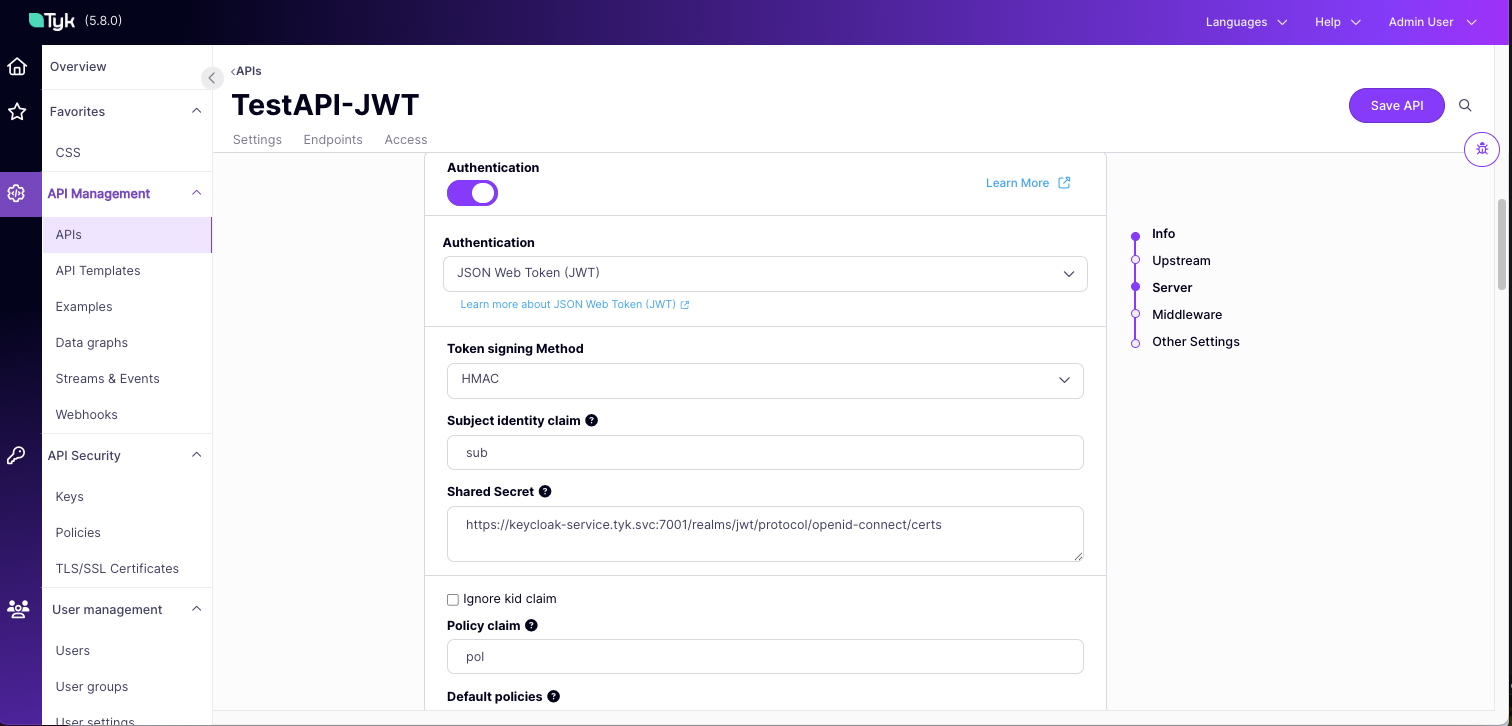
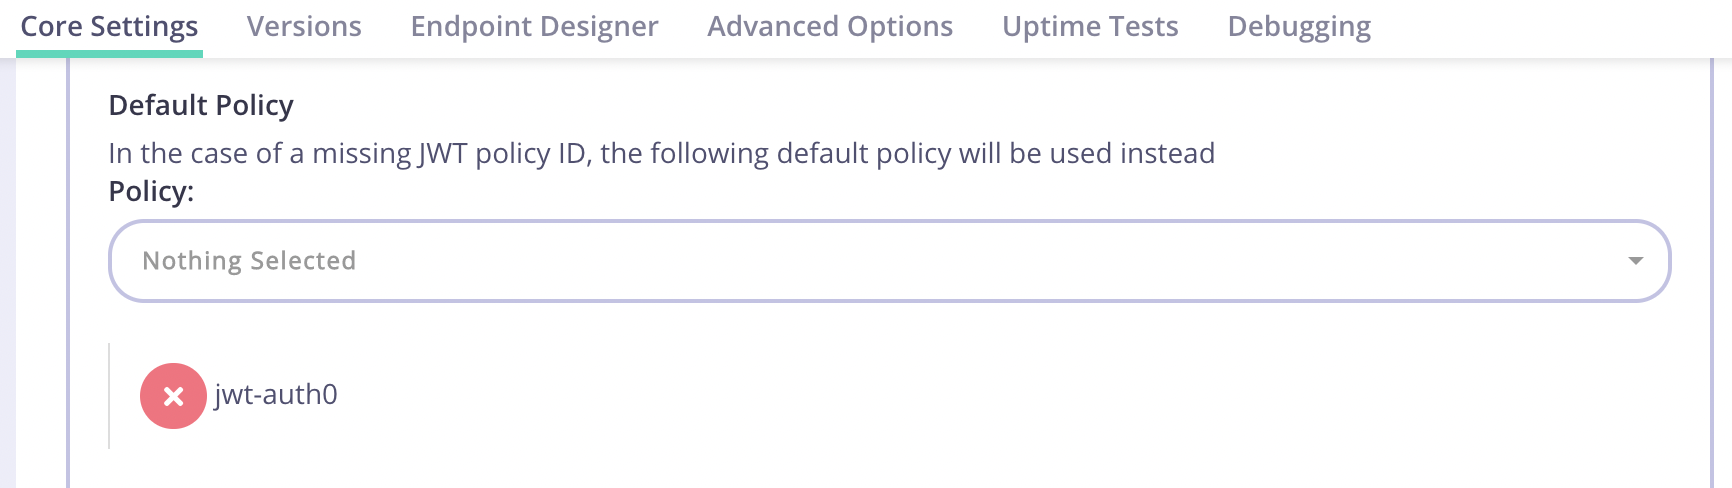
Set a Default Policy
If Tyk cannot find apol claim, it will apply this Default Policy. Select a policy that gives access to this API we are protecting, or create one if none exists.
Make sure to save the changes to the API Definition.
Generate a JWT
Let’s generate a JWT so we can test our new protected API. Head on over to https://jwt.io/. Sign the default JWT with our HMAC Shared Secrettyk123 in the VERIFY SIGNATURE section. Your screen should look similar to this:
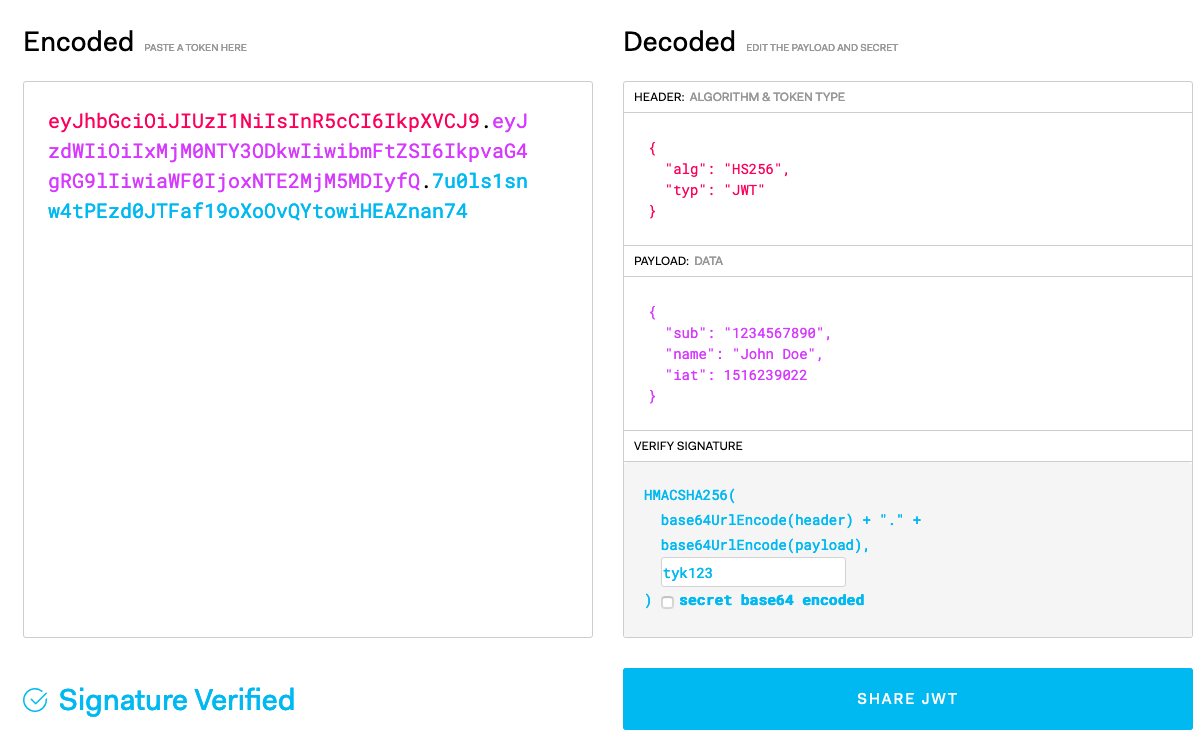 Copy the Encoded JWT and let’s make a cURL against the Tyk API Definition:
Use the JWT
The client includes the JWT in the Authorization header when making requests to the API.| Parameter | Value |
|---|---|
| Method | GET |
| URL | The API endpoint for the protected resource. |
| Authorization | Bearer token, e.g., Bearer eyJhbGciOiJIUzI1NiIsInR5cCI6IkpXVCJ9.... |
JWT and Auth0 with Tyk
This will walk you through securing your APIs with JWTs via Auth0. We also have the following video that will walk you through the process.Prerequisites
- A free account with Auth0
- A Tyk Self-Managed or Cloud installation
Create an Application in Auth0
- Log in to your Auth0 account.
-
Select APIs from the Applications menu.
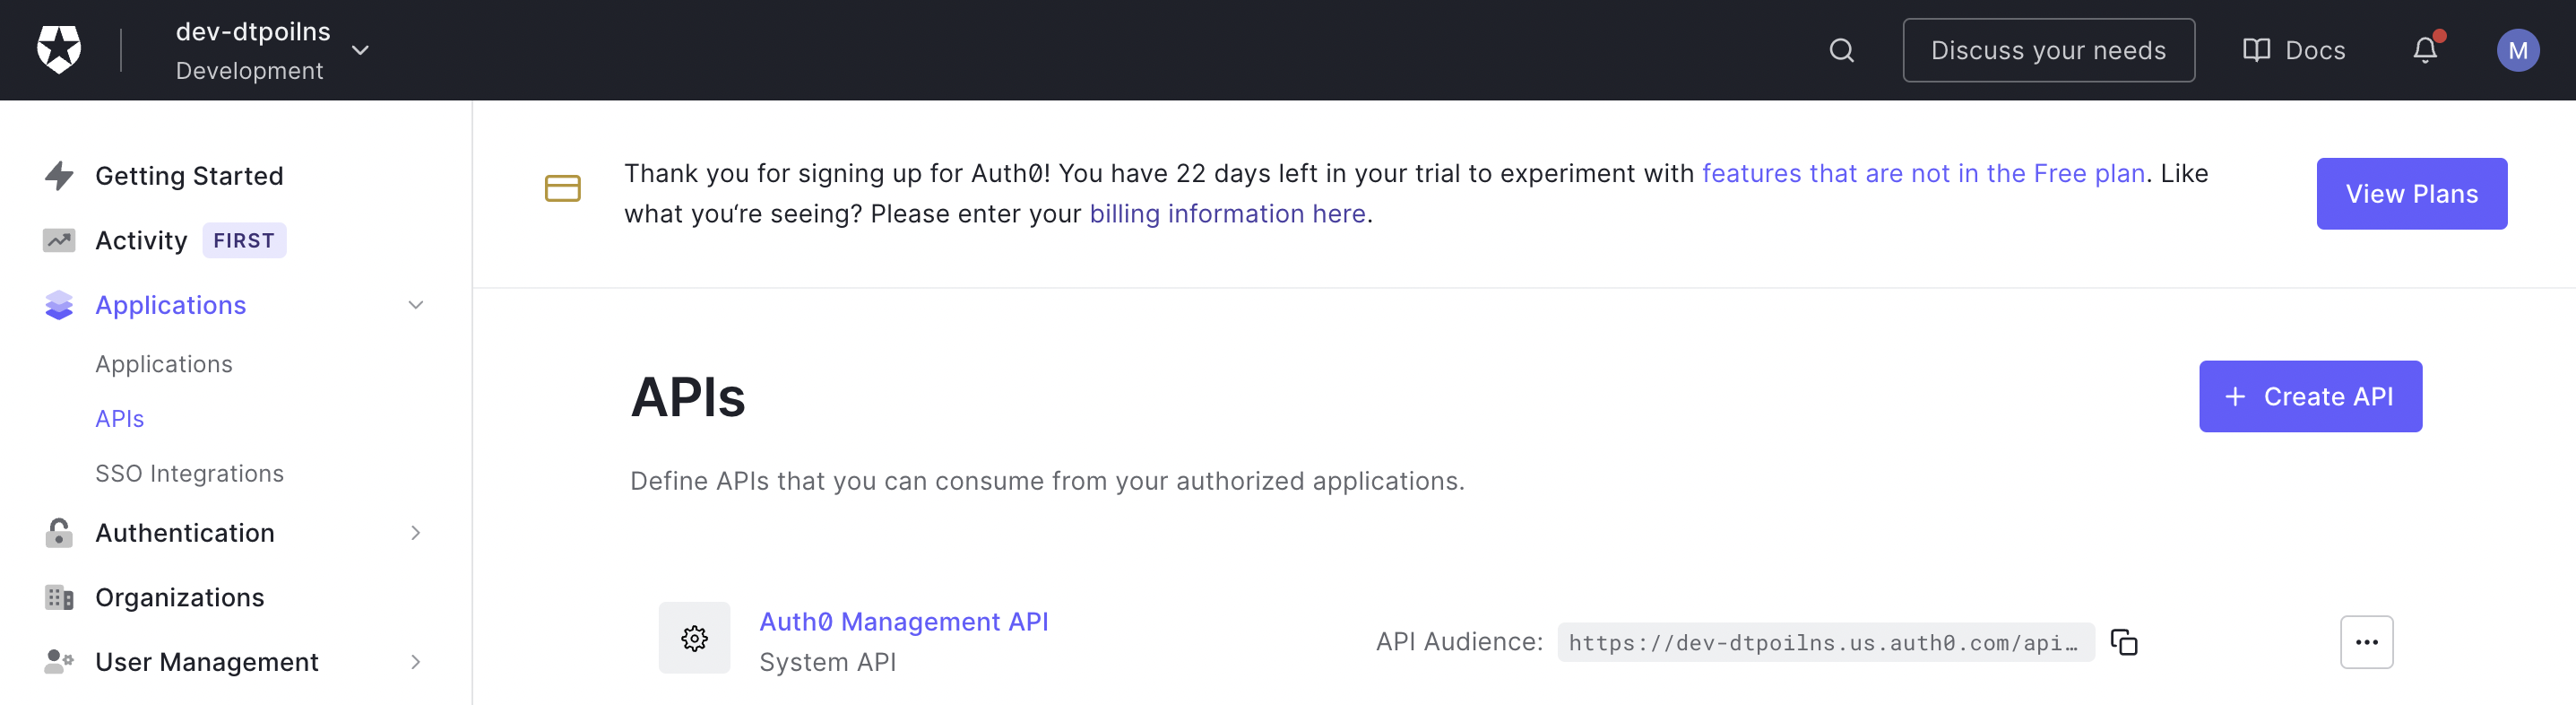
-
Click Create API and enter a name and identifier for your API.
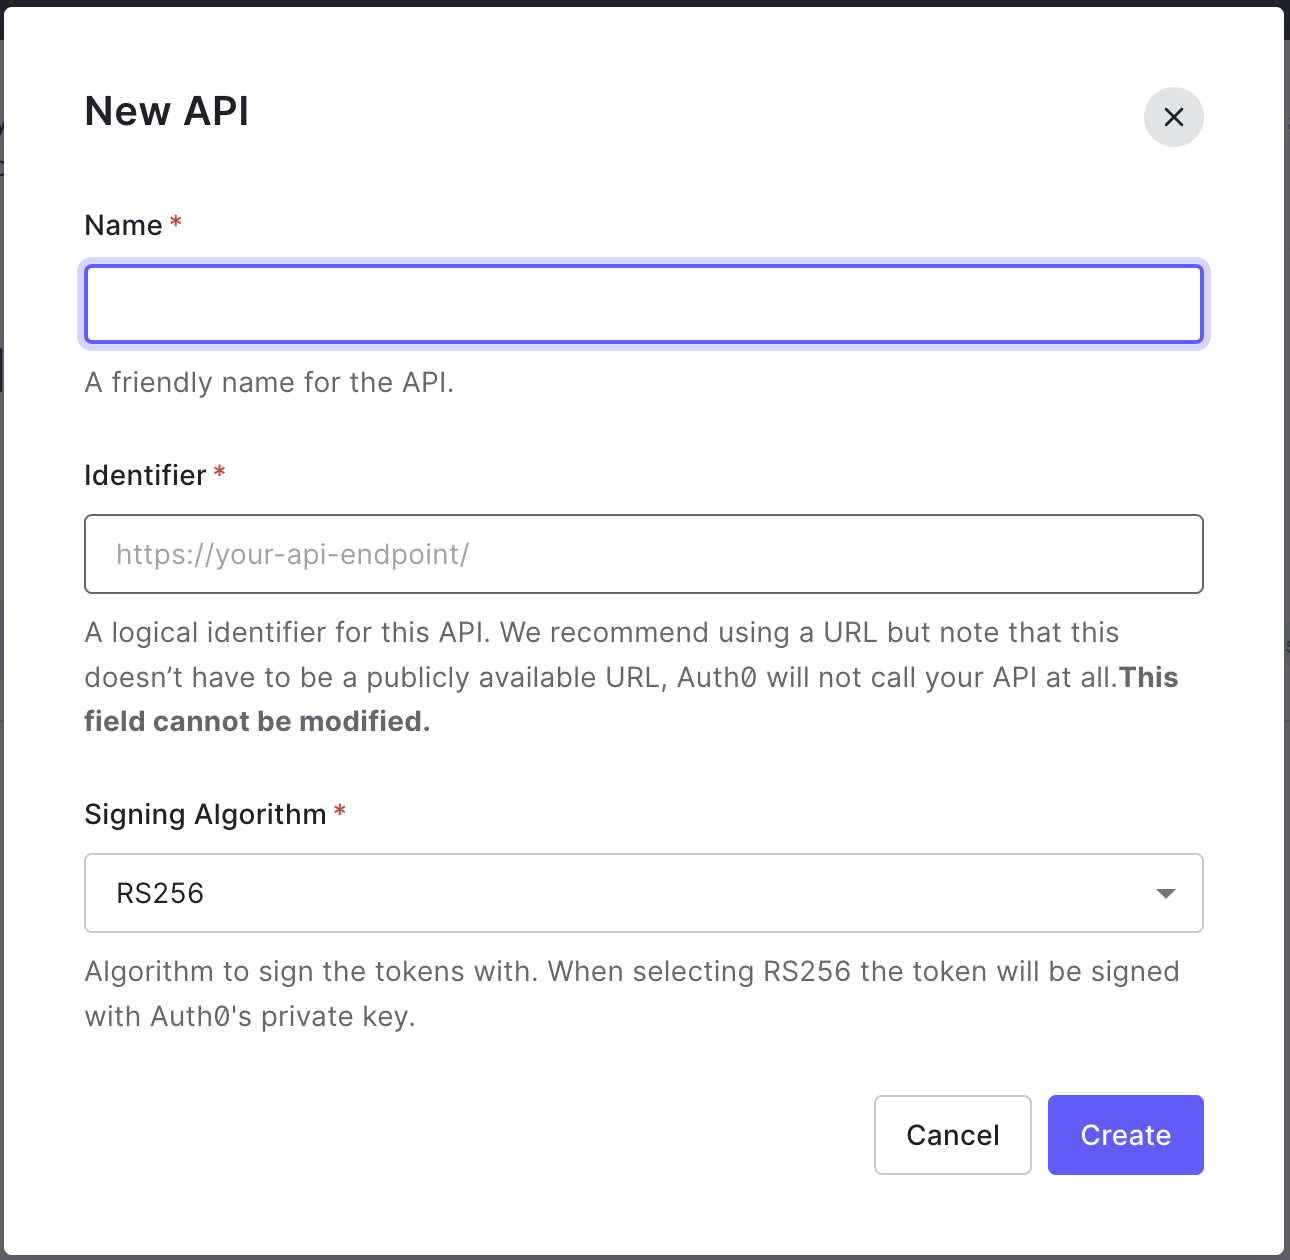
-
From the Test tab, follow the instructions on how to get an access token.
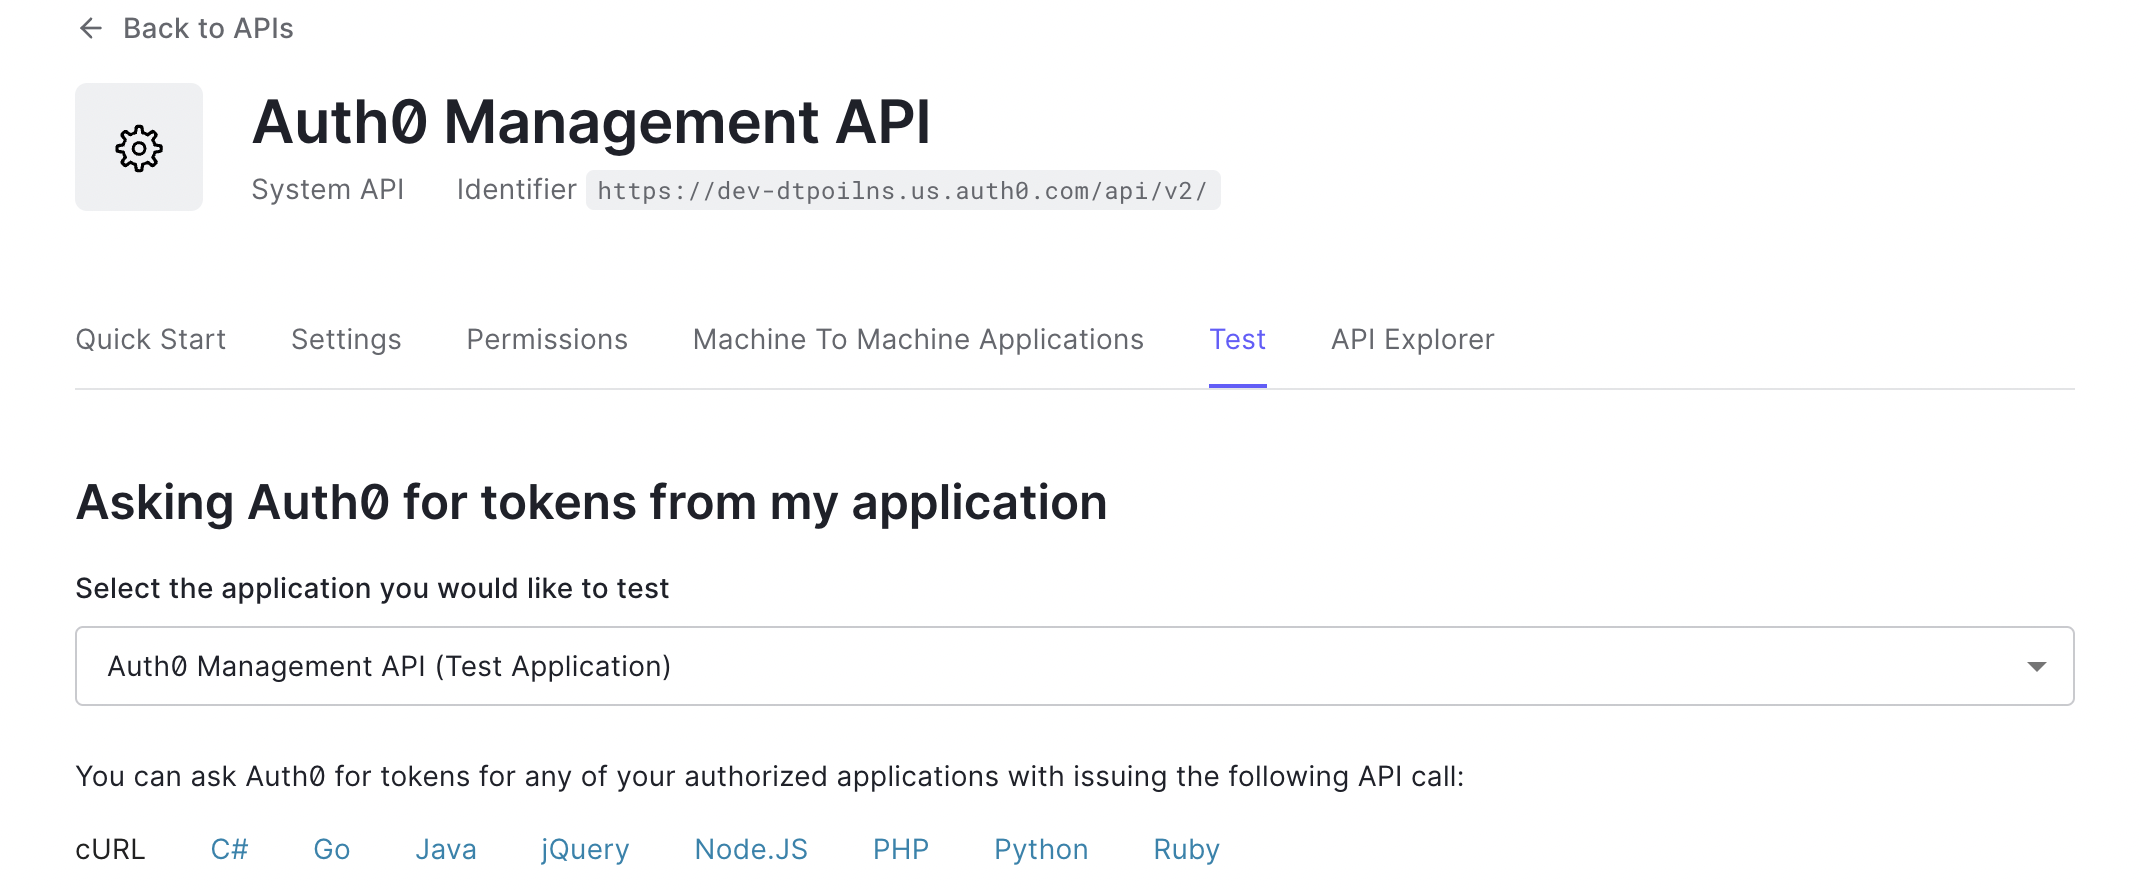
-
From the cURL tab, copy the token request command.
-
Paste the command in a terminal window to generate your token. Save this token locally.
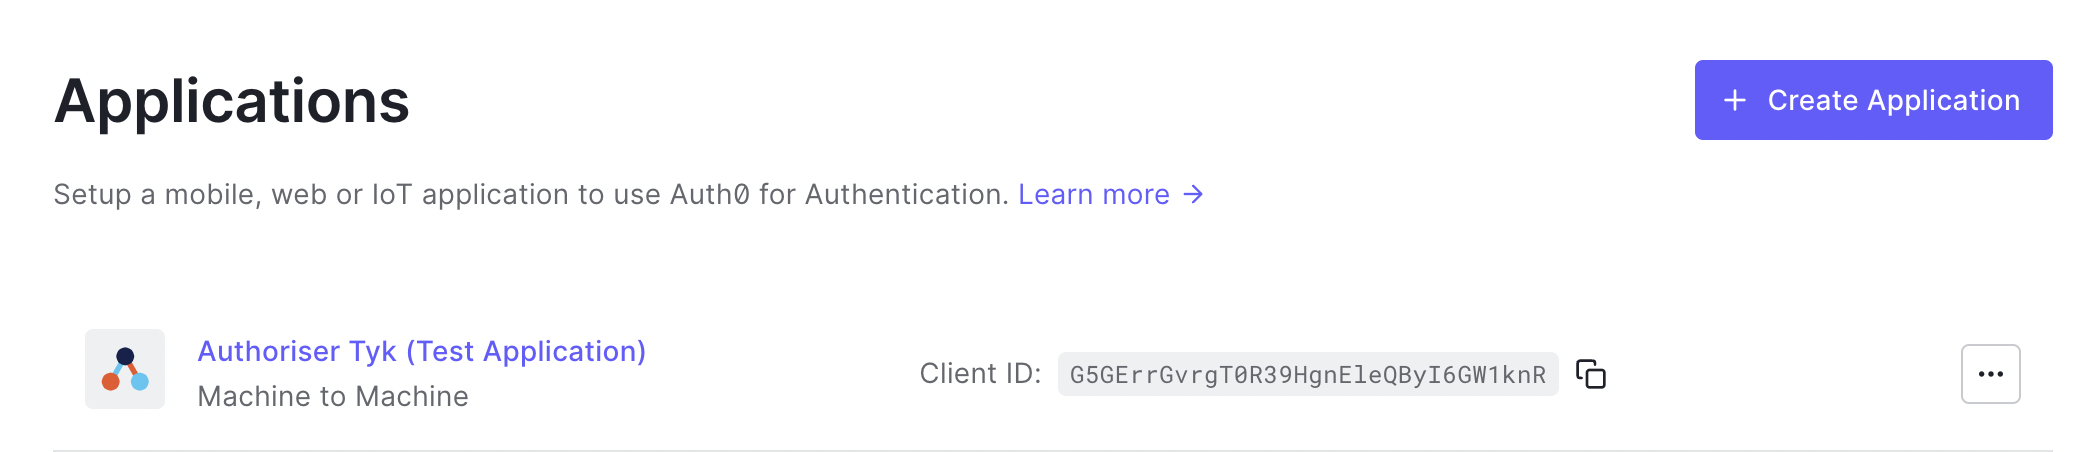
-
After creating your API, a new Auth0 Application will be created. Go to the Applications section to view it.
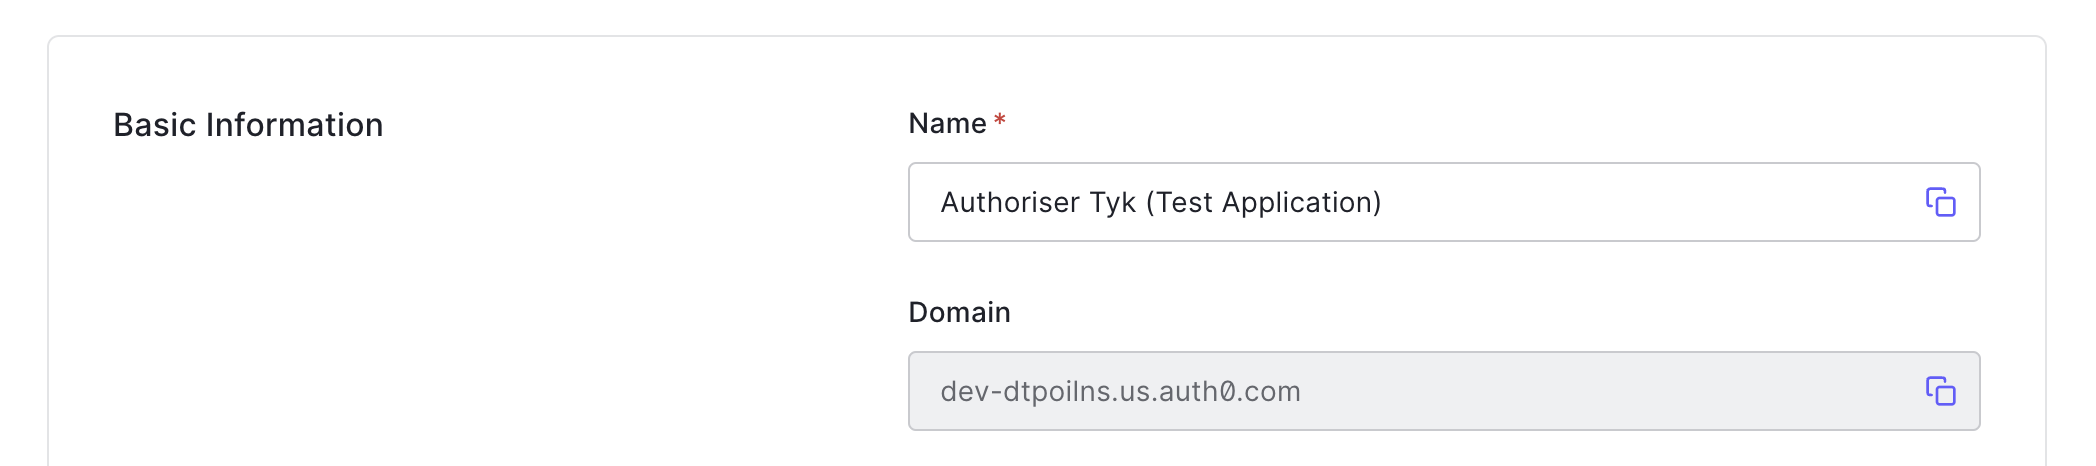
-
Copy the Domain from the Basic Information. You will use this when adding an API to Tyk.
Create your API in Tyk
- Log in to your Tyk Dashboard
- Create a new HTTP API (the default http://httpbin.org upstream URL is fine)
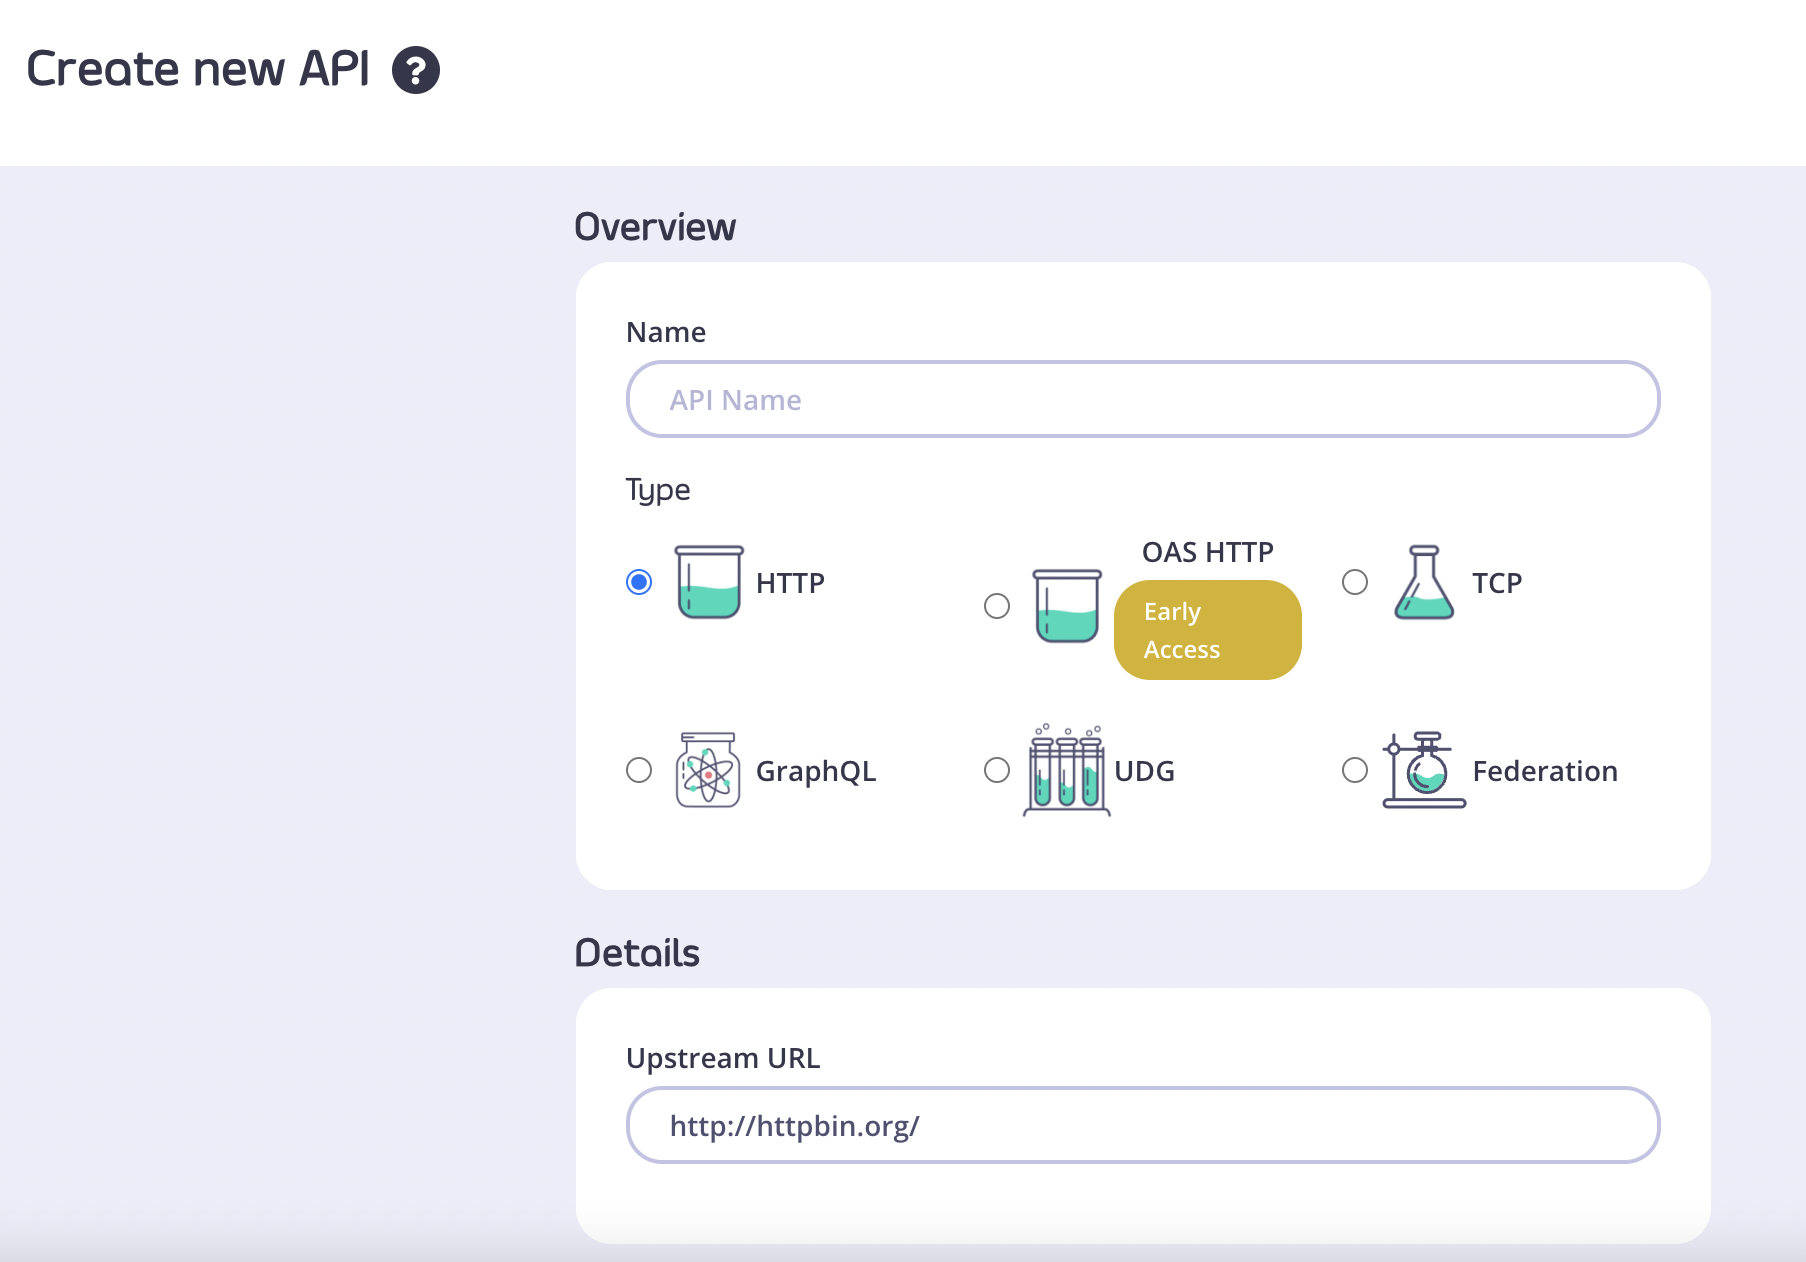
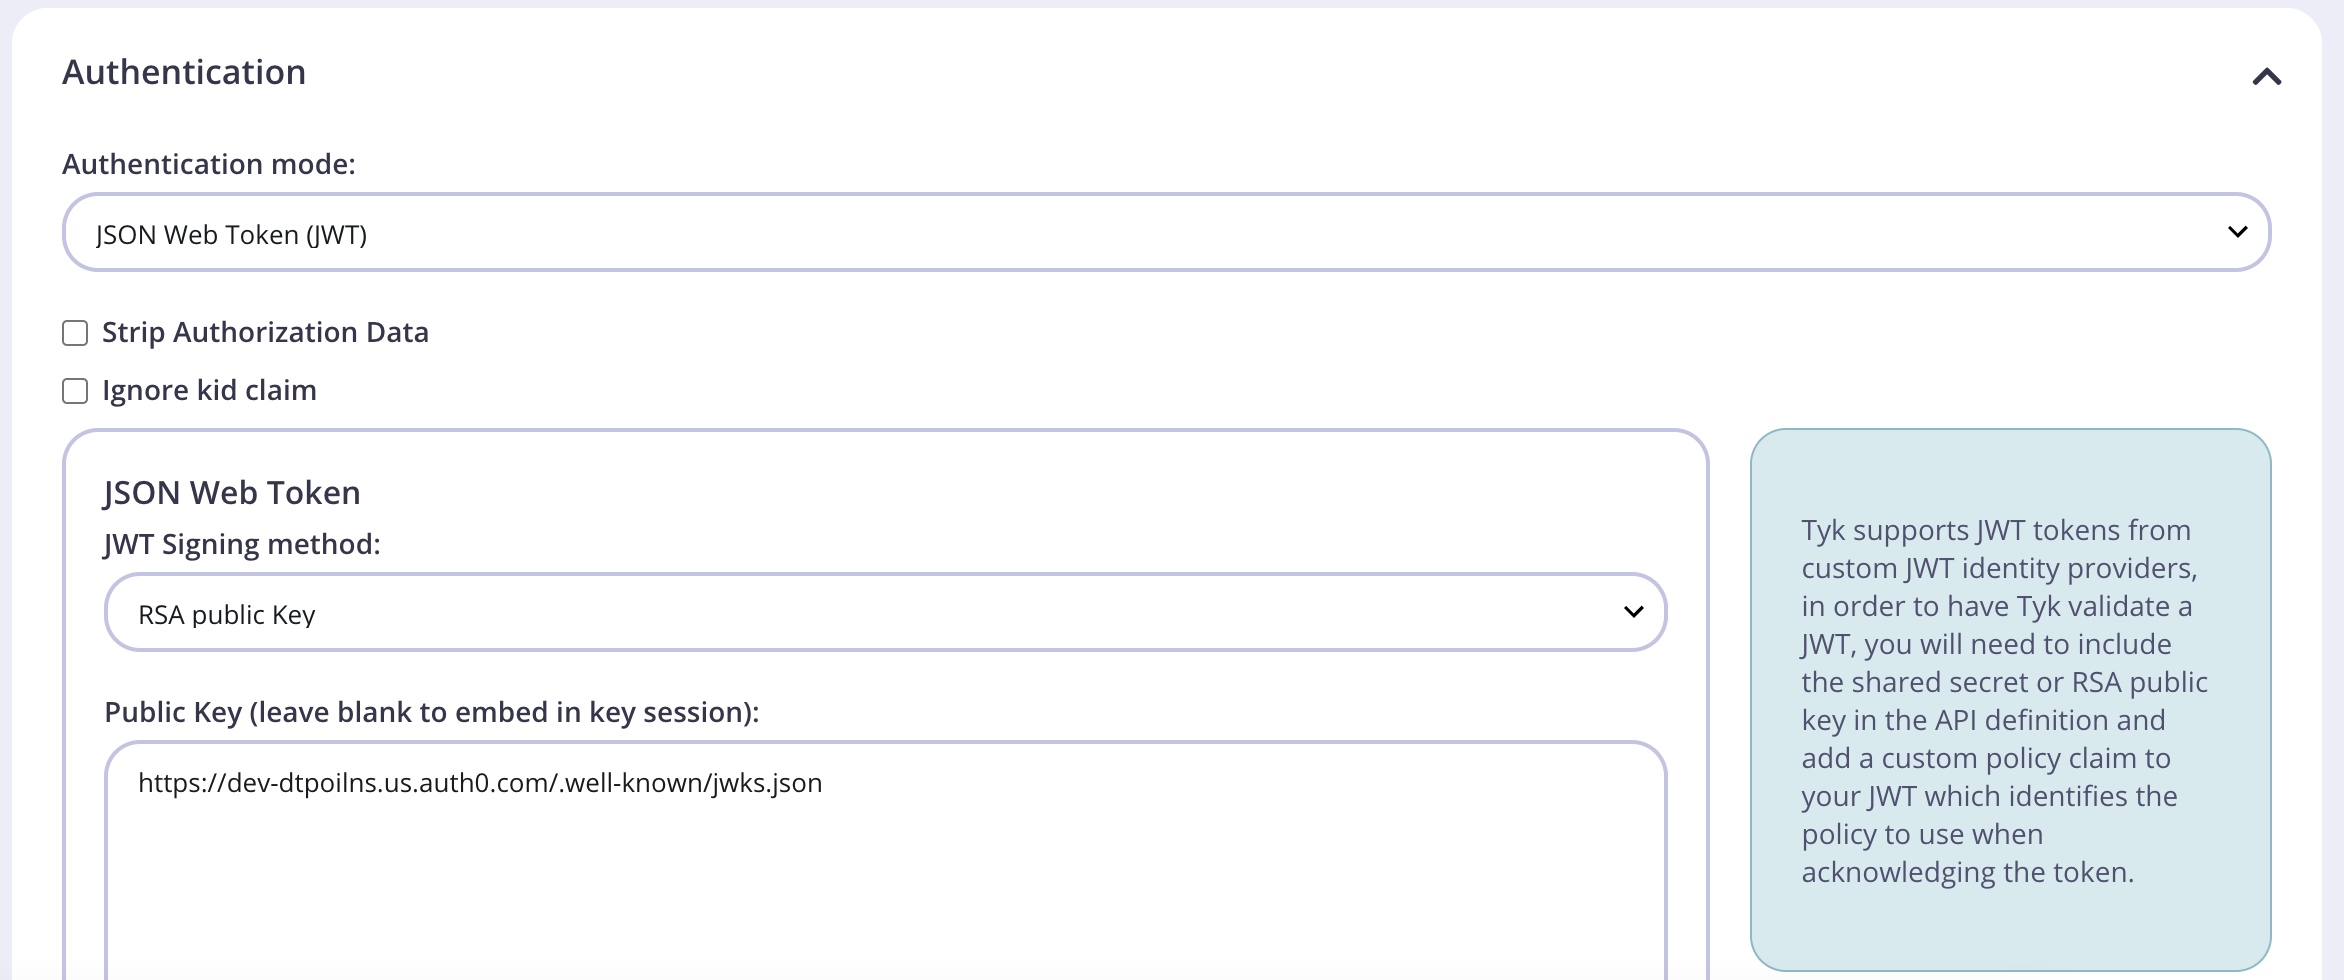
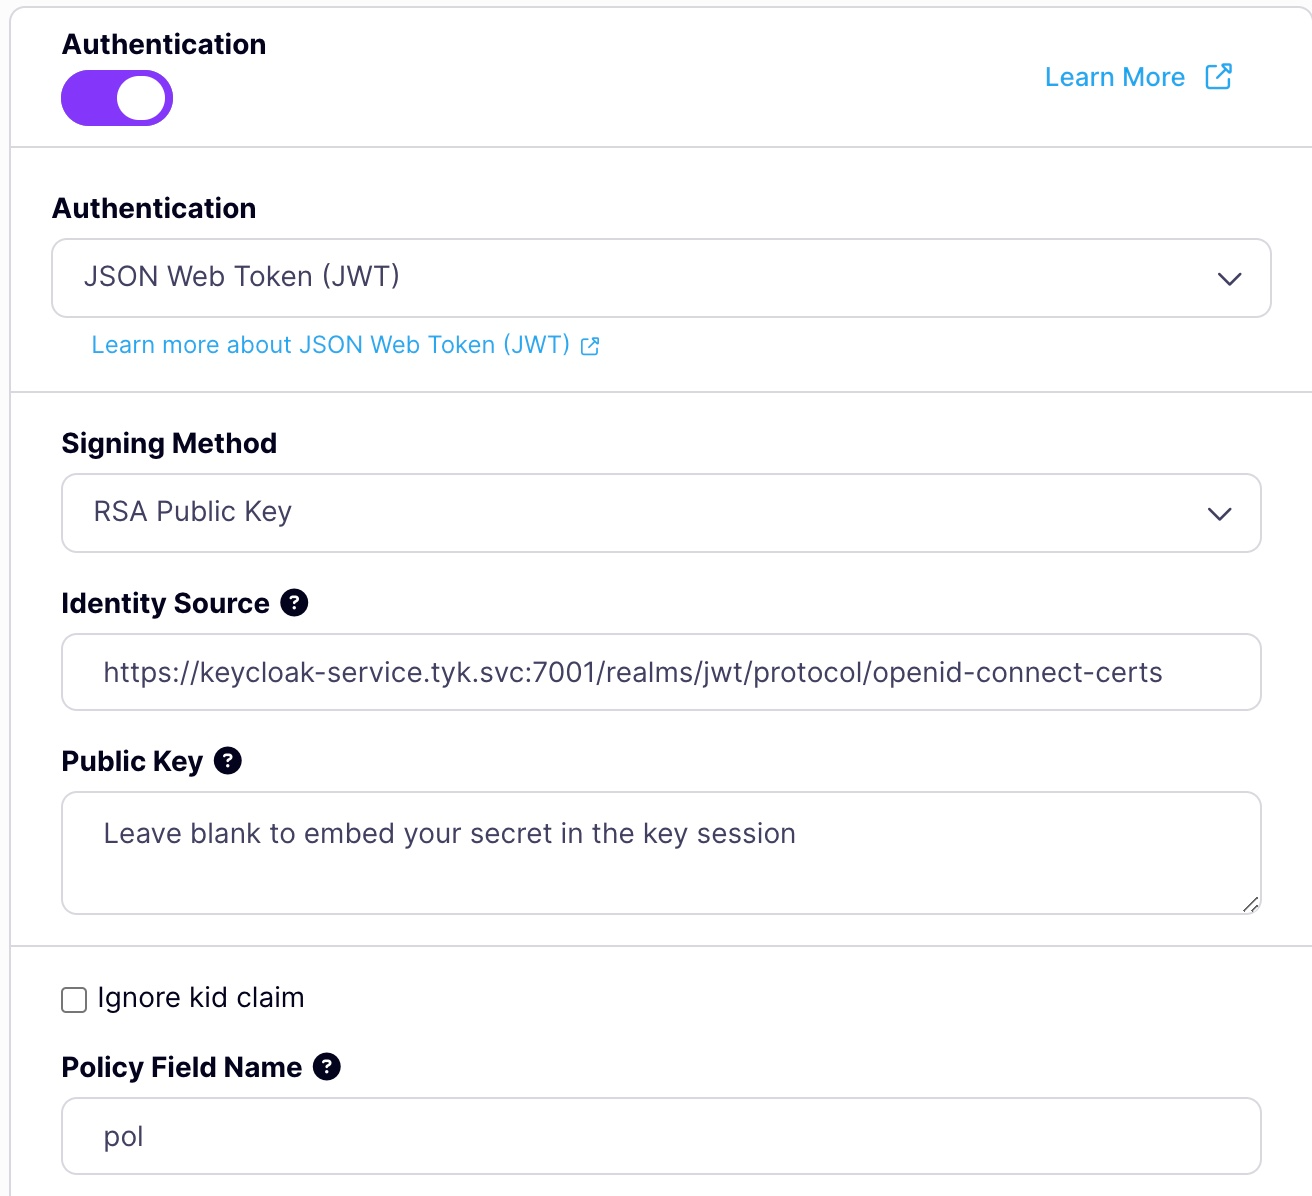
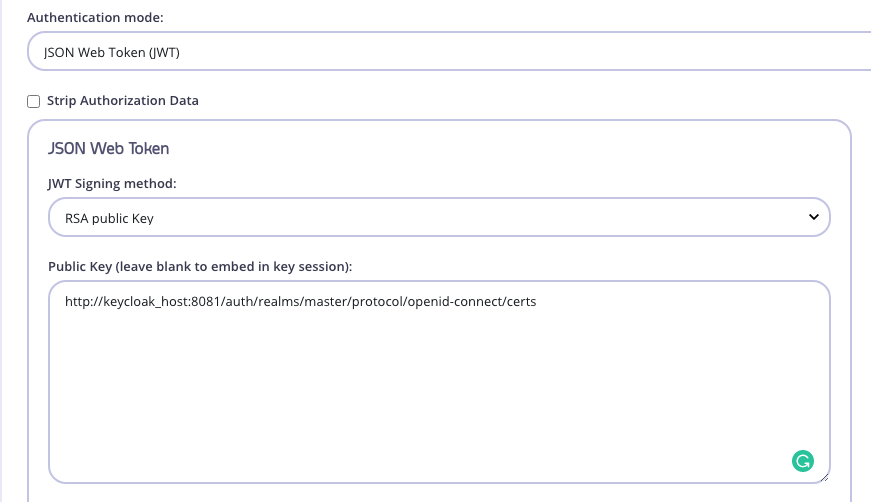
- From the Authentication section, select JSON Web Token (JWT) as your authentication mode.
- Select RSA public Key as the JWT signing method.
- Enter your Auth0 Application Domain from Step 8 above to complete the
jwks_uriend pointhttps://<<your-auth0-domain>>/.well-known/jwks.json - Copy your
jwks_uriin to the Public Key field.
- Add an Identity Source and Policy Field Name. The defaults of
subandpolare fine. - Save your API.
- From the System Management section, select Policies
- Click Add Policy
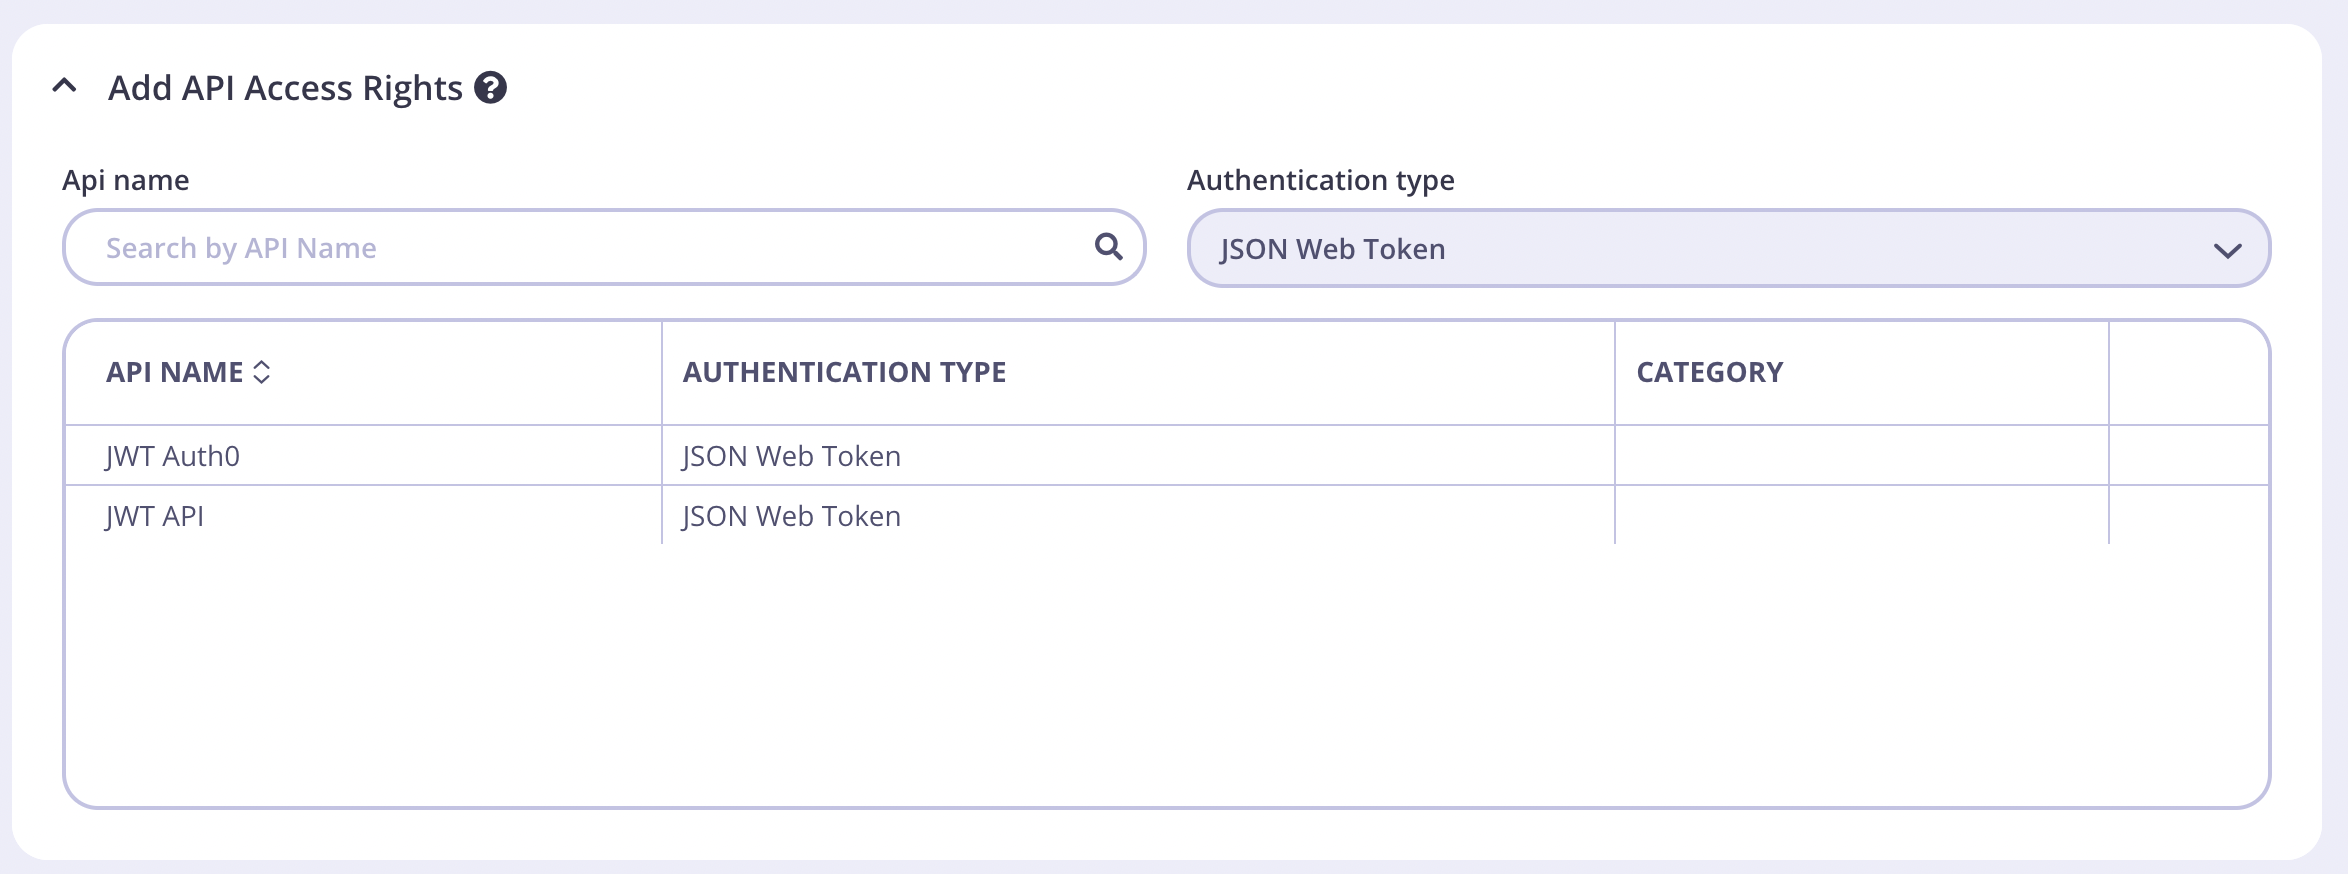
- Select your Auth0 API
- You can keep the rest of the access rights at the defaults.
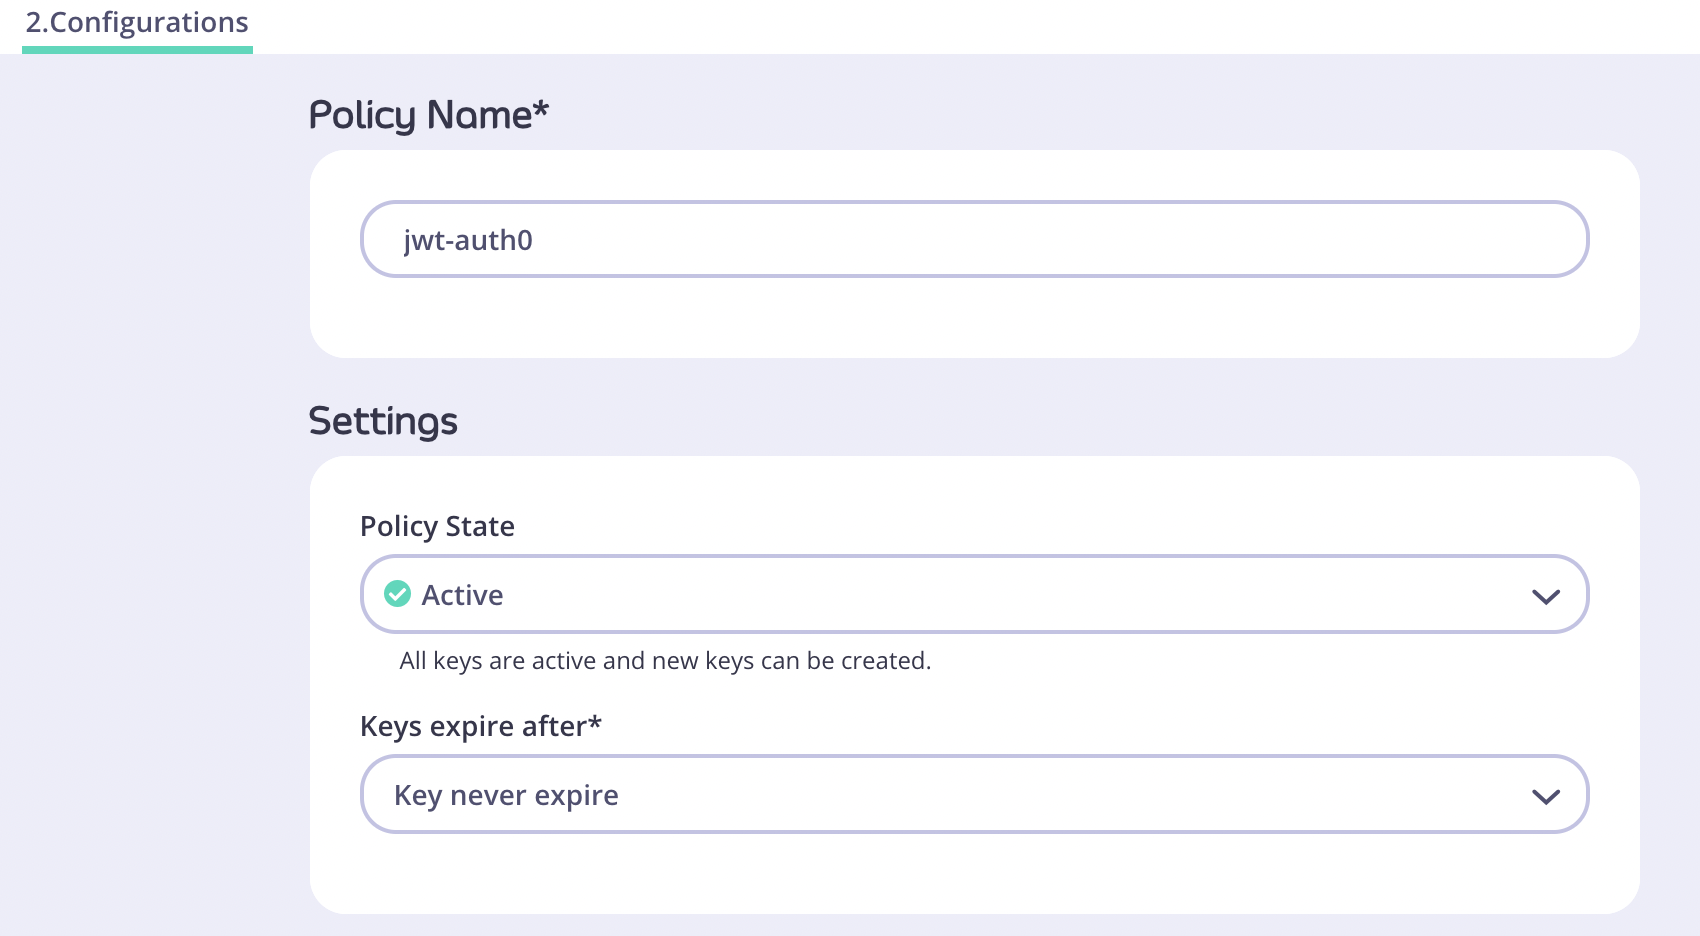
- Click the Configurations tab and enter a Policy Name and a Keys Expiry after period.
- Click Create Policy.
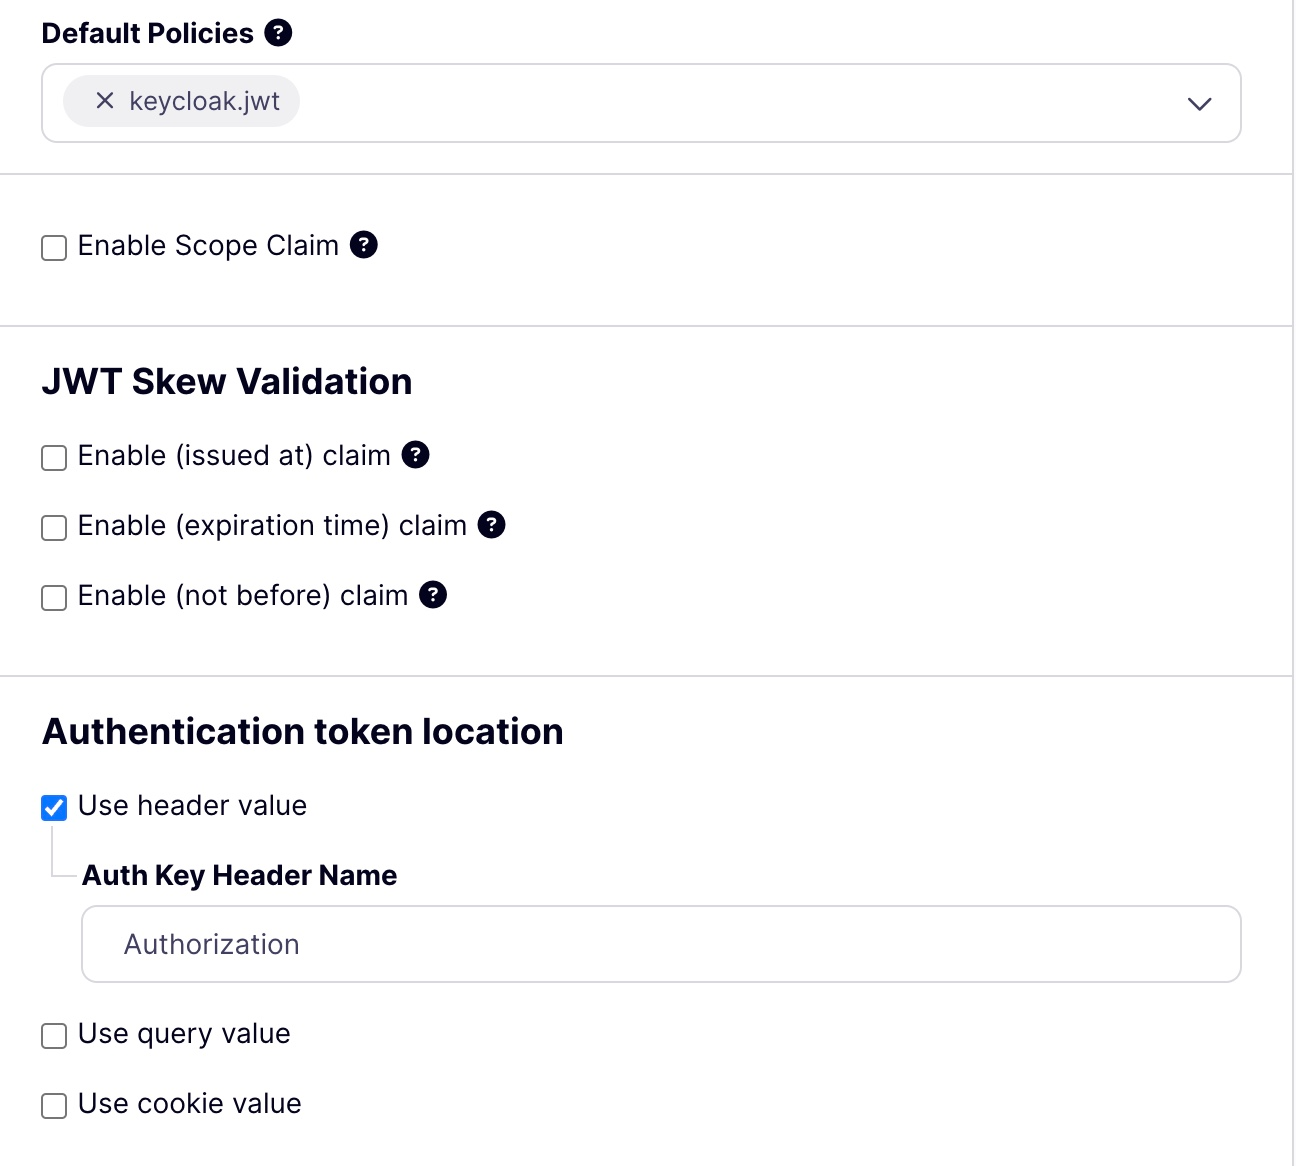
- Edit your JWT Auth0 API and add the policy you created as the Default Policy from the Authentication section.
- From the top of the API copy the API URL
- From a terminal window using the API URL and the Auth0 generated token.
- If using the httpbin upstream URL as in the example Tyk API, you should see the HTML returned for the httpbin service in your terminal.
- If there is an error with the request, you will see the following error message.
Running in k8s
If you are looking to POC this functionality in Kubernetes, you can run a fully worked-out example using our tyk-k8s-demo library. You can read more here.Create Your JWT API in Tyk
- Log in to your Tyk Dashboard.
-
Create a new HTTP API (the default
http://httpbin.orgupstream URL is fine).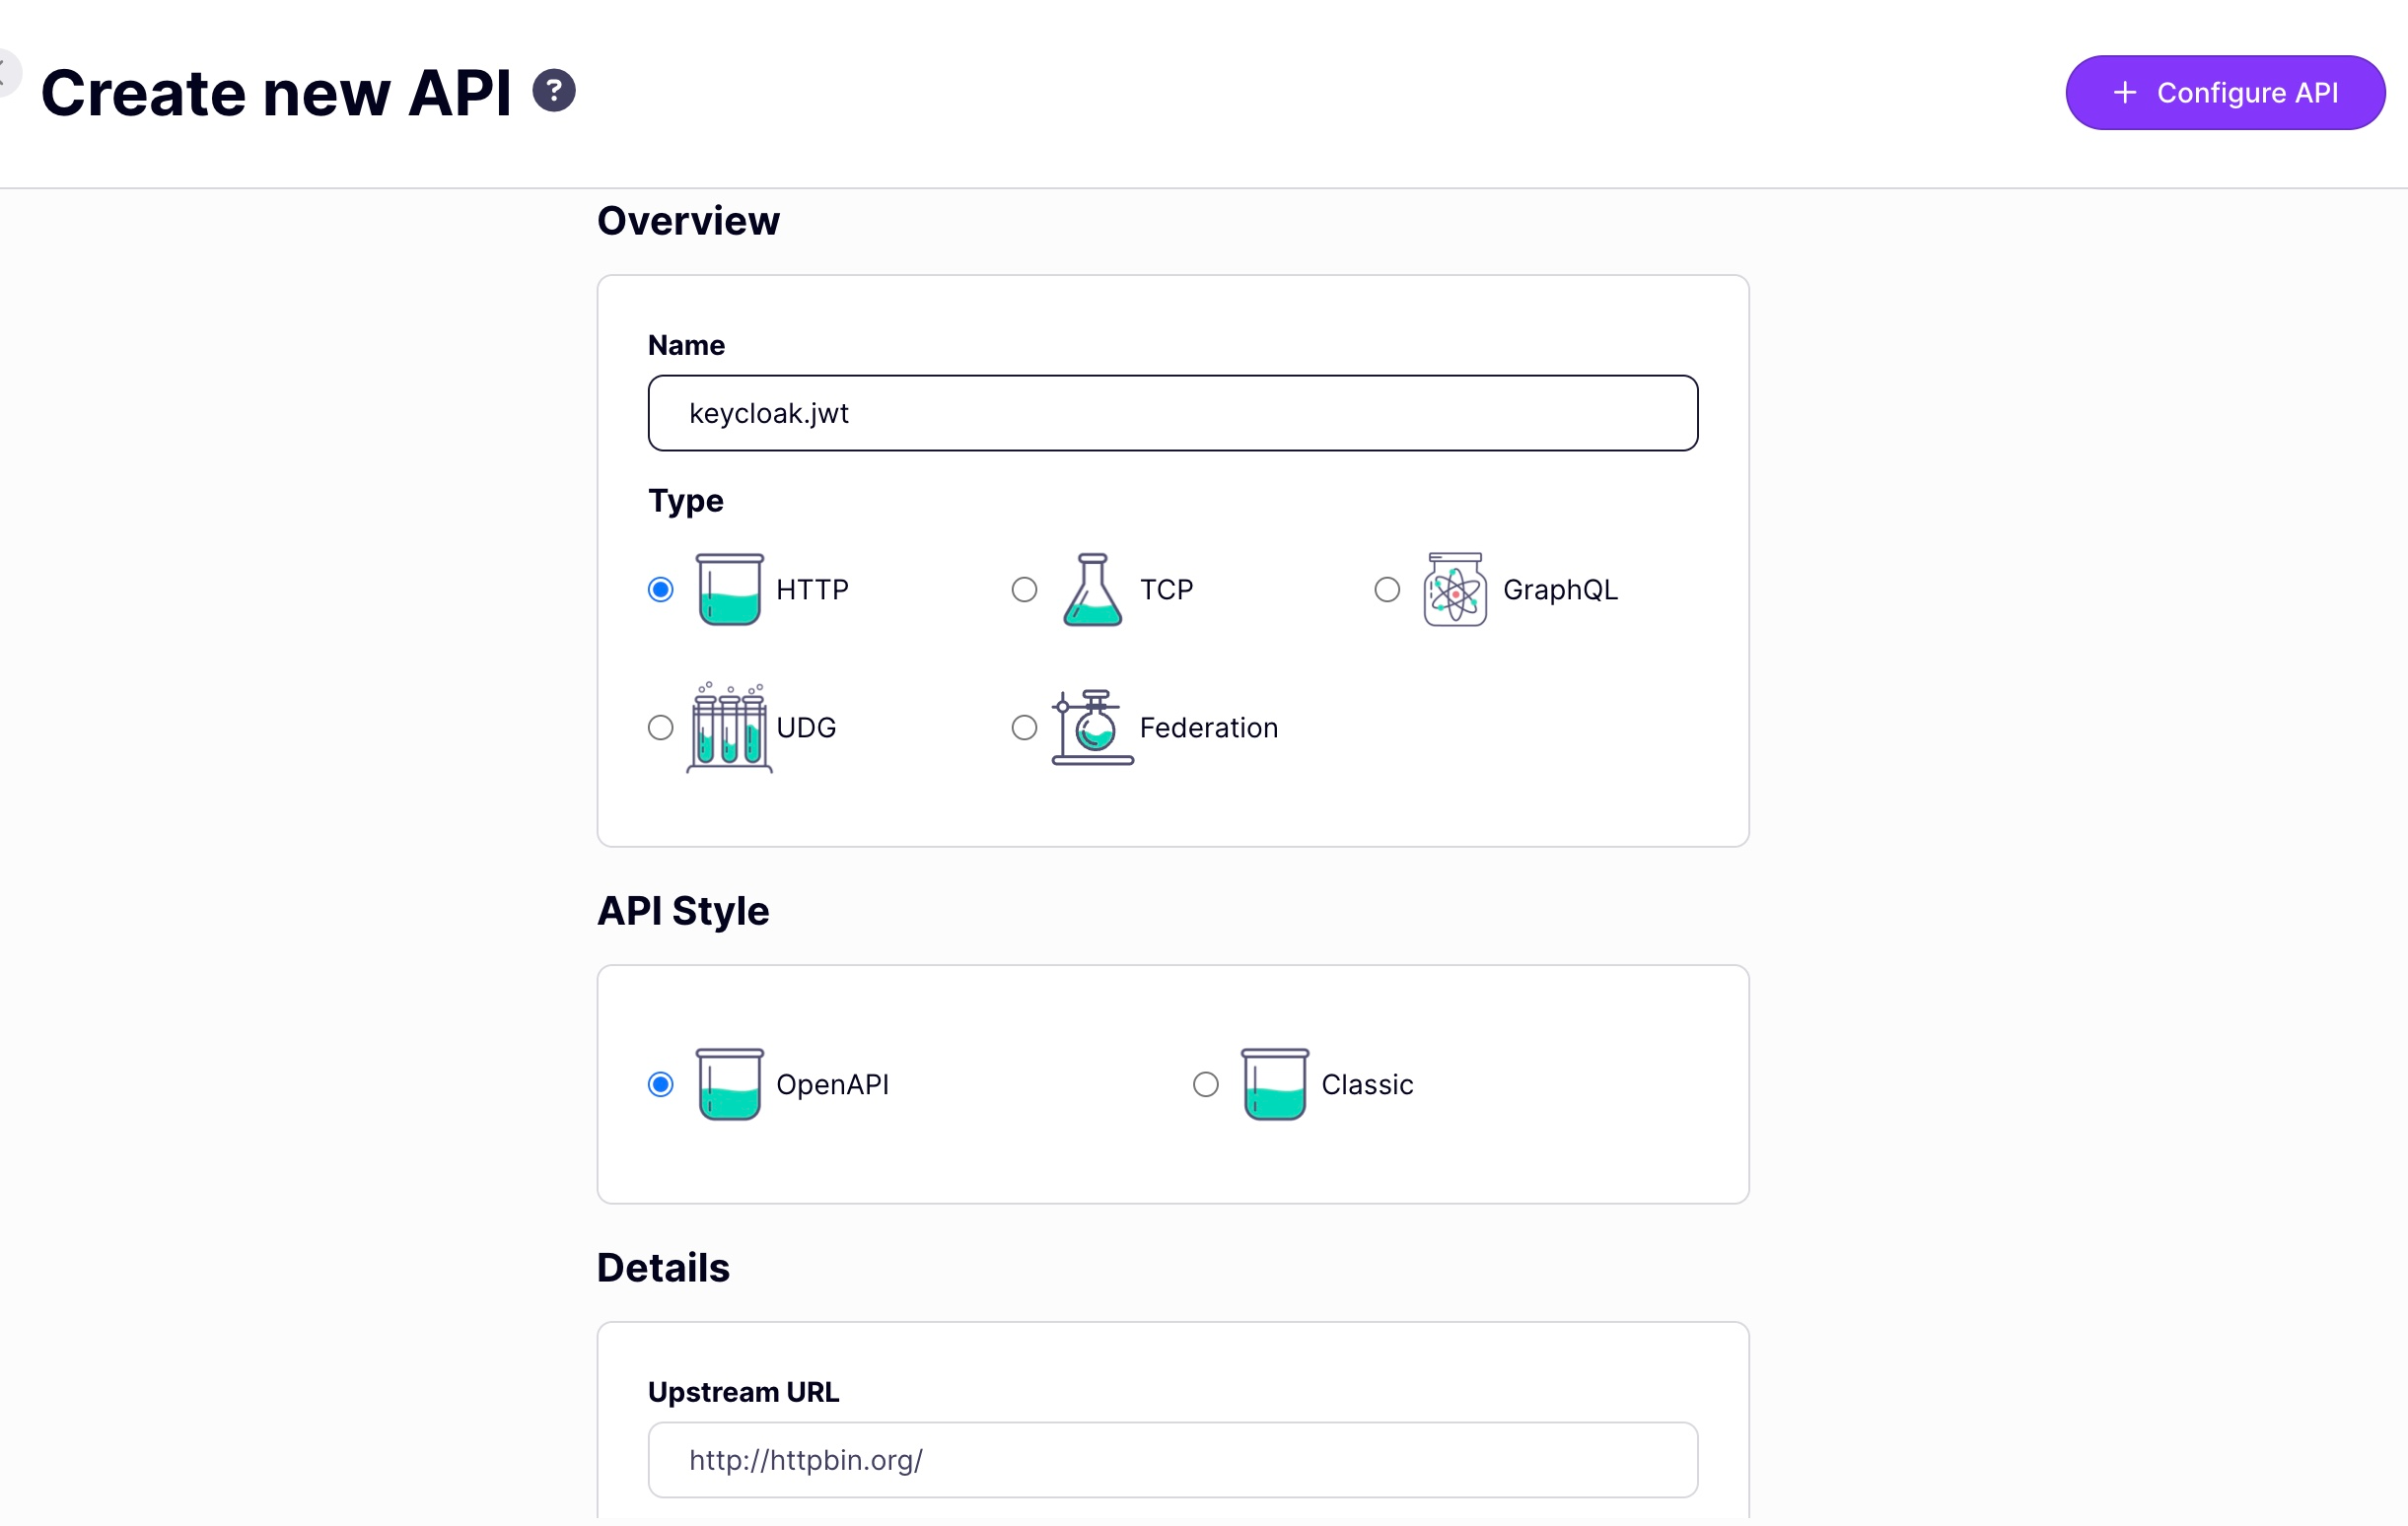
- Scroll to the Authentication mode section and select JWT from the list.
- Select RSA public Key as JWT Signing method.
-
Add your JSON Web Key Sets (JWKS) URL in the Public Key box. This can be found through the well-known config endpoint or is typically
https://KEYCLOAK_URL/realms/KEYCLOAK_REALM/protocol/openid-connect/certs. -
Add an Identity Source and Policy Field Name. The defaults of
subandpolare fine. -
Click on the update button to save the API.
- Create a policy to manage access to your API.
- Navigate to the Policies section on the left-hand side menu.
- Click on Add Policy on the top right-hand side of your screen.
- Select your API from the Add API Access Rights list.

-
Click on the Configurations tab and choose a policy name and TLL.

-
Add the default policy to the API.
- Test access to the API using curl.
-
Retrieve the API URL.
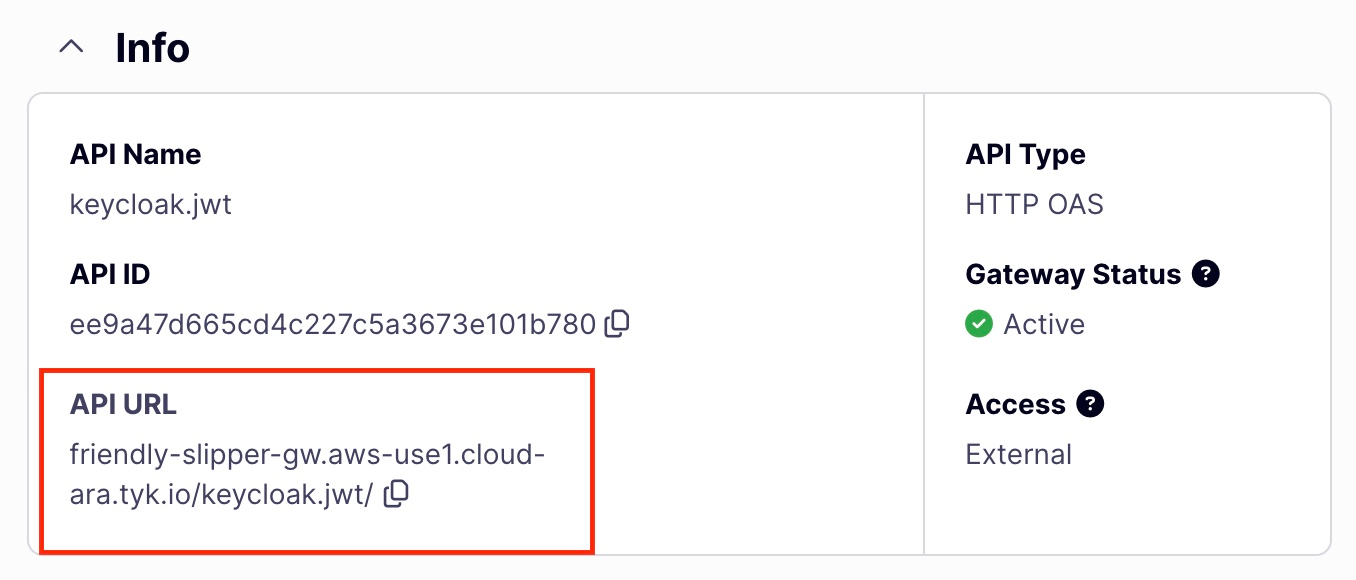
-
Test with curl. Make sure to replace
TOKENwith the JWT you received from the curl earlier.
Split Token
OAuth2, OIDC, and their foundation, JWT, have been industry standards for many years and continue to evolve, particularly with the iterative improvements in the OAuth RFC, aligning with FHIR and Open Banking principles. The OAuth flow remains a dominant approach for secure API access. In the OAuth flow, two types of access tokens are commonly used: opaque and JWT (more precisely, JWS). However, the use of JWTs has sparked debates regarding security, as JWTs can leak information when base64 decoded. While some argue that JWTs should not contain sensitive information, others consider JWTs inherently insecure for authorization.Introduction to Split Token Flow
JWT Access Tokens can carry sensitive information, making them vulnerable if compromised. The Split Token Flow offers a solution by storing only the JWT signature on the client side while keeping the header and payload on the server side. This approach combines the flexibility of JWTs with the security of opaque tokens, ensuring that sensitive data is not exposed.How Tyk Implements Split Token Flow
Tyk API Gateway is well-positioned to broker the communication between the client and the authorization server. It can handle requests for new access tokens, split the JWT, and return only the signature to the client, storing the rest of the token internally. Here’s how you can implement the Split Token Flow using the client credentials flow:Request a JWT Access Token
- Ensure the
kidheader field is included in the JWT for validation.- If the
kidheader is missing, Tyk will check thesubfield. This is not recommended but supported.
- If the
Configure Identity Source and Policy Field Name
Define the identity and policy applied to the JWT:- Identity Source: Select which identity claim to use (e.g.,
sub) for rate-limiting and quota counting. - Policy Field Name: Add a policy ID claim to the JWT that applies a specific security policy to the session.
Enable Dynamic Public Key Rotation Using JWKs
Instead of a static public key, configure a public JSON Web Key Sets (JWKs) URL to dynamically verify JWT tokens:- Use the JWKs URL to dynamically maintain and rotate active public keys.
- Ensure JWTs contain the
kidheader, matching thekidin the JWK payload for verification.
 For example, cURLing the JWKs URL returns:
"jwt_scope_to_policy_mapping"provides mapping of scopes (read from claim) to actual policy ID. I.e. in this example we specify that scope “admin” will apply policy"59672779fa4387000129507d"to a key"jwt_scope_claim_name"identifies the JWT claim name which contains scopes. This API Spec field is optional with default value"scope". This claim value could be any of the following:- a string with space delimited list of values (by standard)
- a slice of strings
- a string with space delimited list of values inside a nested key. In this case, provide
"jwt_scope_claim_name"in dot notation. For eg."scope1.scope2","scope2"will be having the list of values nested inside"scope1" - a slice of strings inside a nested key. In this case, provide
"jwt_scope_claim_name"in dot notation. For eg."scope1.scope2","scope2"will be having a slice of strings nested inside"scope1"
-
Set the claim name that contains the scopes (default:
scope):Several scopes in JWT claim will lead to have several policies applied to a key. In this case all policies should have"per_api"set totrueand shouldn’t have the sameAPI IDin access rights. I.e. if claim with scopes contains value"admin developer"then two policies"59672779fa4387000129507d"and"53222349fa4387004324324e"will be applied to a key (with using our example config above).
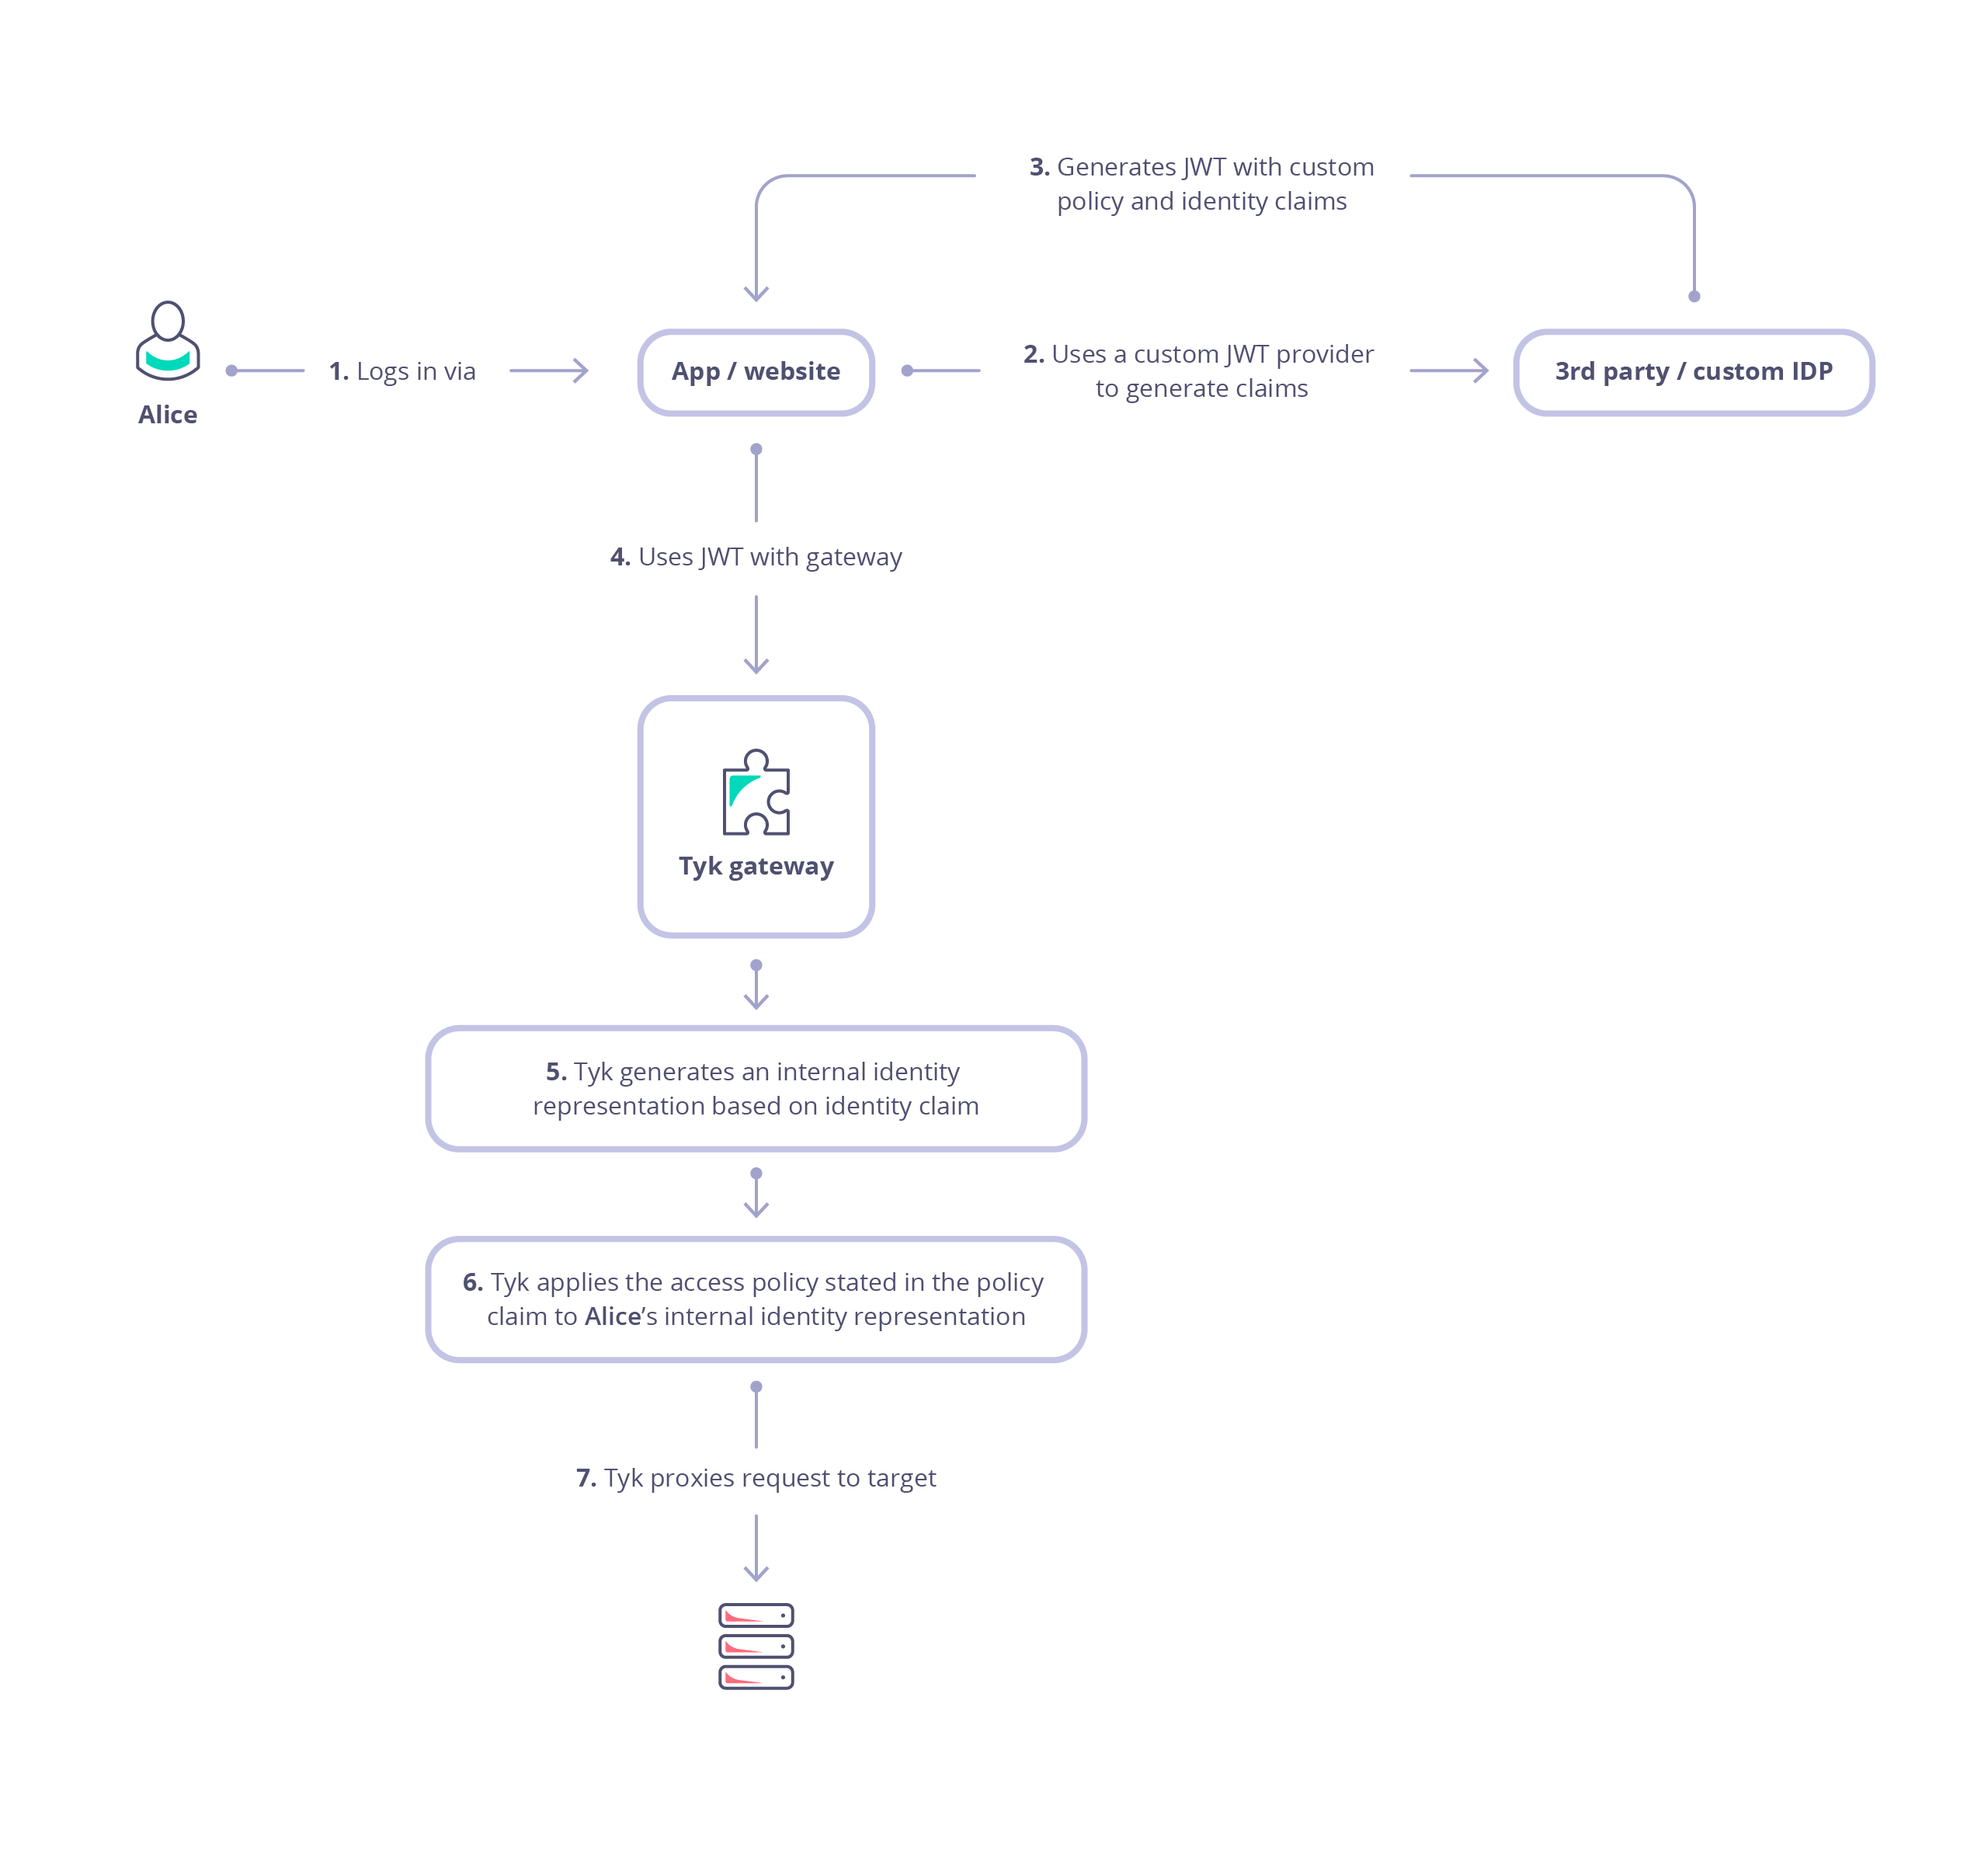
Visualize JWT Flow in Tyk API Gateway
View the diagram below for an overview of JWT flow in Tyk: